Elasticsearch(简称ES) 是一个分布式、高扩展、高实时的搜索与数据分析引擎,它也是一个“存储库”。
它能很方便地使大量数据具有搜索、分析和探索的能力。充分利用 ES 的水平伸缩性,能使数据在生产环境变得更有价值。
本文踏出使用ES的第一步-环境部署,这里把可能遇到的问题整理了一下,详见文章内容。
安装Elasticsearch 7.10
# 为Elasticsearch添加用户
useradd elastic
# 设置密码
passwd elastic

cd /home/elastic

wget https://artifacts.elastic.co/downloads/elasticsearch/elasticsearch-7.10.2-darwin-x86_64.tar.gz

tar -zxvf elasticsearch-7.10.2-darwin-x86_64.tar.gz

cd elasticsearch-7.10.2/
这个home/elastic/elasticsearch-7.10.2目录就是ES的家目录,后面用$ES_HOME代替。
可以使用$ES_HOME/bin/elasticsearch直接启动了,但是会有一些问题,下面来总结一下。
centos 7环境下启动ES7遇到的问题
root用户下启动ES报错
如果没有配置ES环境变量,需要进入到$ES_HOME的bin目录下,执行elastisearch命令启动,每次这样启动感觉有点繁琐,我们来配置一下环境变量:
vi /etc/profile

# 添加
export ES_HOME=/home/elastic/elasticsearch-7.10.2
export PATH=$PATH:$JAVA_HOME/bin:$ES_HOME/bin

# 使之生效
source /etc/profile
然后在任何地方都可以直接敲elasticsearch命令来启动ES了。
but,你会收到这样的错误:
[2021-05-19T23:13:27,102][ERROR][o.e.b.ElasticsearchUncaughtExceptionHandler] [elk-standalone] uncaught exception in thread [main]
org.elasticsearch.bootstrap.StartupException: java.lang.RuntimeException: can not run elasticsearch as root
提示很明显了,就是不让用root用户启动ES,这个解决方法简单,切换到普通用户再启动就行了。
前面安装步骤中我已经提前机智的添加好elastic用户了,现在派上用场了。
切换到elastic用户,再直接用elasticsearch命令就不行了,因为还没有为这个elastic用户配置环境变量呢,现在来配置:
vi ~/.bash_profile

# 同样加上ES的家目录
export ES_HOME=/home/elastic/elasticsearch-7.10.2
export PATH=$PATH:$ES_HOME/bin

# 使之生效
source ~/.bash_profile
这样就可以和root用户一样爽了!
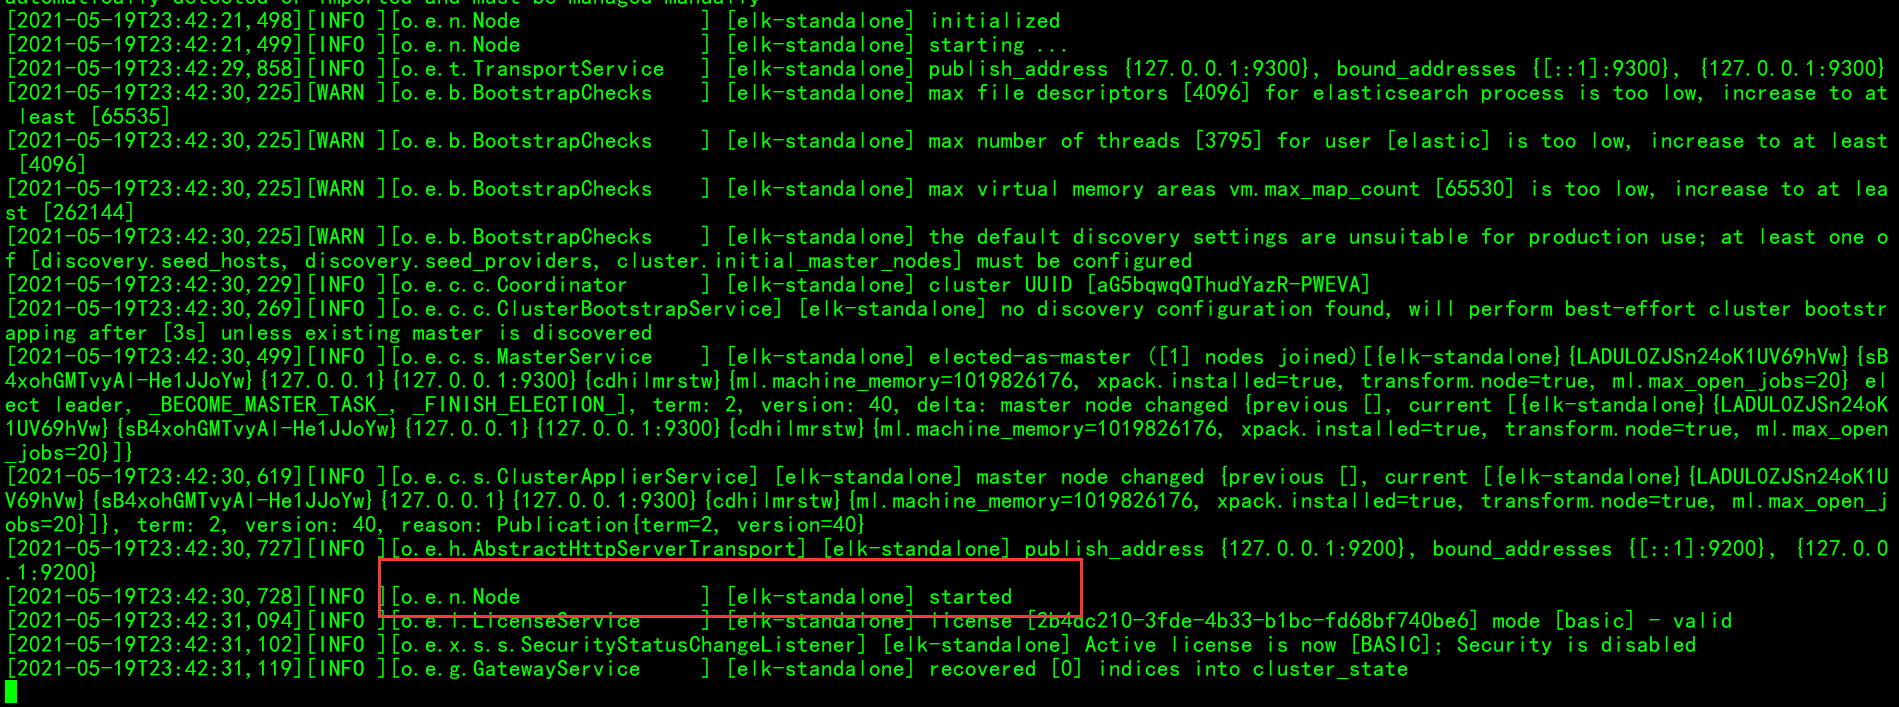
启动成功:

使用jps看一下:

客户端连接问题
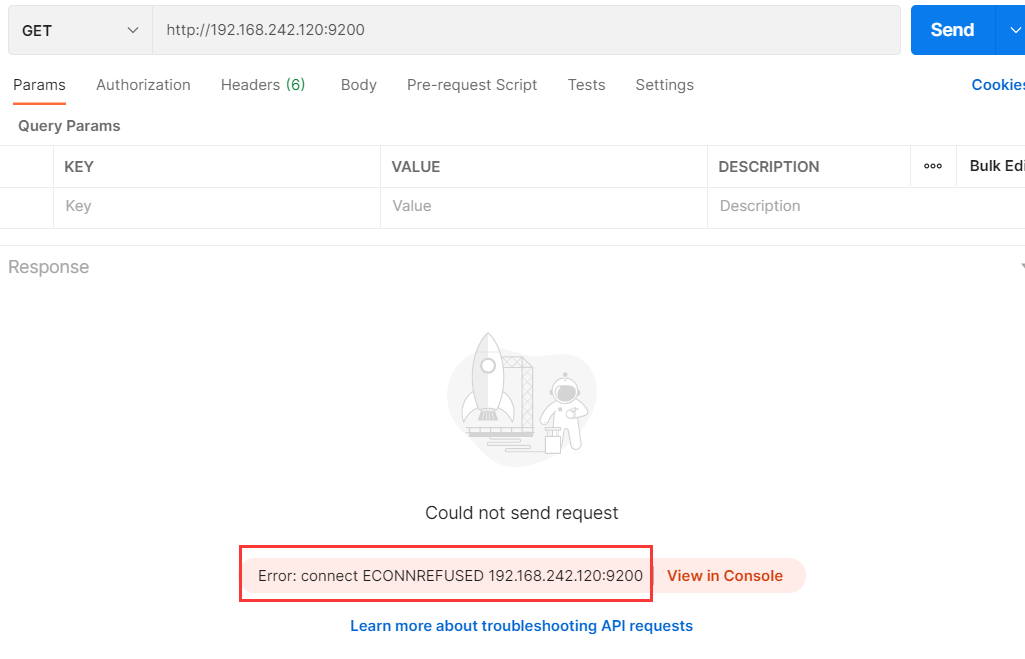
成功启动以后,我们用postman连一下试试,地址:http://192.168.242.120:9200

连接不上!
这个时候根据经验就要去看一下配置文件了,ES的配置文件在$ES_HOME/config目录下,瞅瞅:

打开elasticsearch.yml,修改其中的配置项:
# 将network.host修改为0.0.0.0,使客户端能连接
network.host: 0.0.0.0
重新启动之,应该就行了吧?
启动报错
按Ctrl-C直接关掉ES,
前面说的启动都是在前台启动ES,实际中我们不可能前台启动程序,一般都是后台启动,这里为了方便看日志和演示才前台启动。
后台启动时,直接在 elasticsearch -d就好了,停服务的时候,先找到ES的PID,然后kill掉。
重新输入elasticsearch启动,这次竟然报错了!
报错详细信息:
bound or publishing to a non-loopback address, enforcing bootstrap checks
ERROR: [4] bootstrap checks failed
[1]: max file descriptors [4096] for elasticsearch process is too low, increase to at least [65535]
[2]: max number of threads [3795] for user [elastic] is too low, increase to at least [4096]
[3]: max virtual memory areas vm.max_map_count [65530] is too low, increase to at least [262144]
[4]: the default discovery settings are unsuitable for production use; at least one of [discovery.seed_hosts, discovery.seed_providers, cluster.initial_master_nodes] must be configured
ERROR: Elasticsearch did not exit normally - check the logs at /home/elastic/elasticsearch-7.10.2/logs/elasticsearch.log
有四项错误:
[1]: max file descriptors [4096] for elasticsearch process is too low, increase to at least [65535]
[2]: max number of threads [3795] for user [elastic] is too low, increase to at least [4096]
这两项的意思就是elasticsearch进程的最大文件描述符[4096]太低,至少增加到[65535];用户elastic的最大线程数[3795]太低,至少增加到[4096]。
那么我们就来按照它的指示增加一下:
# 在root用户下操作
vim /etc/security/limits.conf
# 修改最大进程数和最大线程数
# 在文件末尾添加
elastic hard nofile 65536
elastic soft nofile 65536
elastic hard nproc 4096
elastic soft nproc 4096
其中elastic为运行ES程序的用户。
再来看下一个问题:
[3]: max virtual memory areas vm.max_map_count [65530] is too low, increase to at least [262144]
这个提示是要让我们改一下vm.max_map_count,这个参数在/etc/sysctl.conf这个文件里添加:
# 在root用户下操作
vi /etc/sysctl.conf

# 在文件末尾添加
vm.max_map_count = 655360

# 保存退出
# 使之生效
sysctl -p

第四个问题:
[4]: the default discovery settings are unsuitable for production use; at least one of [discovery.seed_hosts, discovery.seed_providers, cluster.initial_master_nodes] must be configured
意思是默认的配置不适合生产使用,必须至少配置discovery.seed_hosts、discovery.seed_providers、cluster.initial_master_nodes中的一个,这就需要我们再改下config/elasticsearch.yml文件了:
# config/elasticsearch.yml文件,修改如下的参数下如:
node.name: node-1
cluster.initial_master_nodes: ["node-1"]
OK,保存,再次用elastic用户重启,见证奇迹:


启动成功!
再用postman验证一下:

完美解决!
最后
Elasticsearch,
“You Know, for Search”
文章首发公众号:行百里er,欢迎大家关注。代码仓库:
https://github.com/xblzer/JavaJourney


